
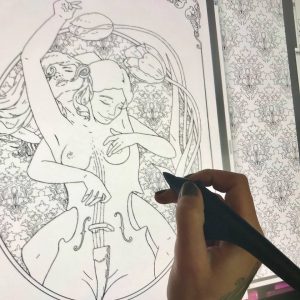
Many of you already enjoy my published coloring books and various individual coloring pages that I create from time to time to entertain my group members. I invite you now on a small journey behind the scenes of actually creating one of such pages. I create all of my line art designs in a program called Corel Painter, using a stylus to draw directly onto my Wacom drawing screen. (For a more technical description of the process check out my articles How I Paint Digitally and What Is Digital Painting)
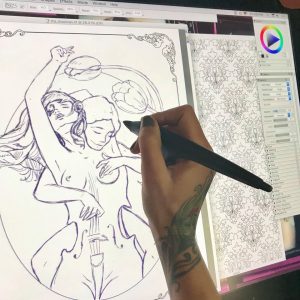 It all begins with an idea. Once I have a clear character concept in my head (which is teaming with ideas at any given moment) I open a new blank document and begin a rough sketch with my pencil tool set to a charcoal or a rough pencil, and usually in a color other than black. I tend to sketch in purple or brown. At this point I am only interested in working on the composition. I freehand my characters the way that I would on a notepad with an actual pencil. I erase a lot to correct my lines as I shape the desired composition. I continue sculpting in this manner for the next hour or so, depending on the complexity of my design. In this case, you will be following the creation of “The Musician” page for an upcoming book. Since this is a book project, instead of a blank page, I am working on a pre-made “frame” page that will be consistent throughout the book.
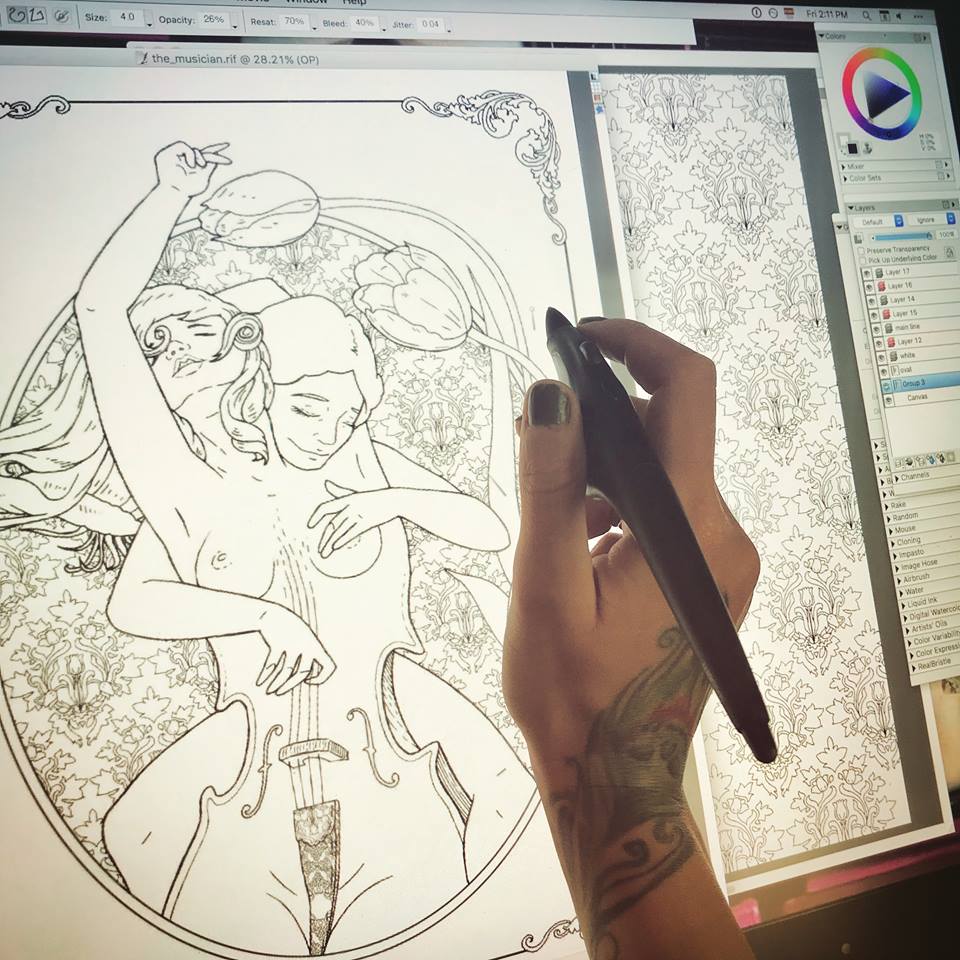
 Once I have my composition I create a new layer. I dim the purple layer a bit, and begin drawing clean black lines over the transparent sketch. At this point I have my pencil tool set to “single, circular, (soft) cover” and, generally working on a 2400 x 3000 at a 300 px/in resolution, I set the pencil/brush in the range of 3.2 and 4.2 at a medium to lower opacity, with a rest value of 70%, bleed 40% and jitter at 0.04. The combination variations on these settings are of course unlimited, and every artist sets his own stats according to personal preference. This is by no means an instruction manual on how to set your controls. This is simply what I find to be the most effective given my screen with its wear and tear, the pressure of my hand as I draw, the current tip of my stylus, etc. These numbers are set and adjusted according to so many variables that it would take a book to explain it all. For our immediate purposes, let’s just say that I found my sweet spot and I work with it for best results and consistency, in coloring pages only. I have completely different preferences for other types of digital creations. As a matter of fact I have several palette layouts saved in my window arrangements, and I switch between them depending on my project.
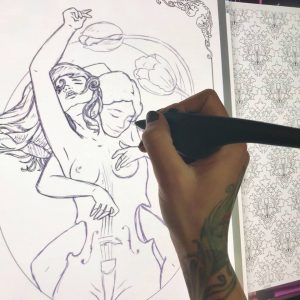
 Once my clean black line work is done – a tedious and careful process – I can kill my purple layer. It is no longer needed. Of course I don’t have to erase it all together. I can dim it, or just make it invisible for the time being. Looking at just the black line work, I can see imperfections and inconsistencies. I now zoom in and out a lot, looking for anything that needs cleaner lines, smoother turns, etc. Because this is to be a coloring page, my lines need to be flawless.
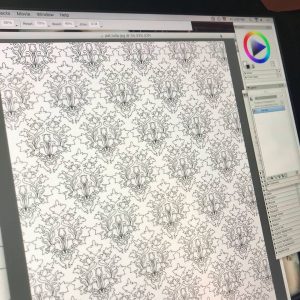 This particular book will be a character centered fantasy compilation, with each individual page presenting a new character drawn in a style closer to my natural drawing style rather than a traditional color-in mosaic page. However, to compensate for this fluidity that may be intimidating to some colorists, each page will also be embellished with elaborate background designs and patterns. Knowing that I will be drawing this character, I already created her background pattern days ago. All of my patterns are my original creations, drawn in the same manner as I am drawing this page, and saved as .jpg files for further use. Now that I have my background pattern, I can copy and paste it onto “The Musician”, resized, styled, and otherwise altered to suit my needs.
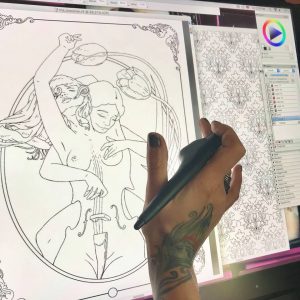
 In this case, I minimize my pattern and make it into a gel layer, which I place under the main line layer. Now I can play with cropping and shaping it to appear just in the oval behind my characters. There are multiple ways of doing this. The first being simply starting my design with a patterned oval, then dimming it to comfortably draw my characters in a different layer, and once drawn filling my characters with white inside the outlines, and then bringing up the background pattern. There are many other methods of creating this effect using the fill tool and multiple layer arrangements, and even multiple file combinations, but I chose to do this in a bit of a primitive way this time. When I began this page I had a clear vision of my characters and their positioning in relation to each other and the page, but I did not yet know where and how I may use the pattern that I created days ago, or if I would even use that pattern at all. Having left my pattern work to the last minute, and having under-layed it in a gel layer, I just work around with my eraser tool, taking off all unwanted spill. A bit tedious, I know. With all this technology you would imagine that I can just click this and drag that and voila! a pattern fill, but no. Now I sit for nearly half an hour carving my pattern out to fit its shape. Sometimes that just feels like the better way to do it. This way I know I have complete control of my edges and their cleanliness.
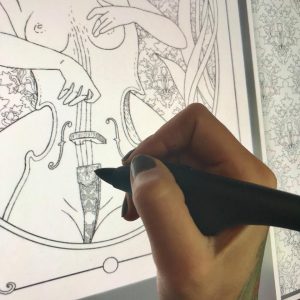 Now I look over my creation and take some time to add tiny detail and decoration. On this particular page, my characters are not wearing any fabrics nor ornaments, so my only decorative bits are the cello details. In some cases I like to draw very fine lines in the hair, giving it shape and volume that is almost realistic, but in this case the background is too thin and busy. If I add many new lines to the characters’ hair, It will be difficult to see its general shape. I chose to leave the hair on both girls nearly blank, with just enough lines to define its structure, allowing the colorist variation in coloring style. There will be many more characters in this book with very finely drawn hair.
Finally, when all is done, I create yet another layer to give my line work more definition. In these complex compositions with multiple layers of fine detail, I like to use lines of various thickness to make the design “readable” and not overwhelmingly complicated. I carefully outline my two main characters and the two tulips with a thicker liner. I take yet more time to slowly revise every single line at a very close zoom. This is the most important part of the entire project. Usually I leave it to another day. After having worked on this page for so long, it is difficult to see mistakes or imperfections. After I’ve been away from the image for some time, I review it again with a fine toothed comb. When I am satisfied that there are no artifacts, spills, or ghost lines, I fuse all my layers into one and save my .riff creation as a .jpg copy. I actually print the image on my layer jet home printer to make sure that on paper it looks exactly as it does on the Wacom. Looking at a printed version may also reveal imperfections that I failed to see on the glowing screen that I’ve now been staring at for days. If any final imperfections are located, I make the necessary adjustments, make more test prints until I am happy with the result, save my image as a PDF file, and it is now ready for publication.
I hope you enjoyed this little journey along with me as I drew “The Musician”. In a couple of months you will see it among several dozen other images in the new book flip-through.